For More Information
Search the Web


Online Training

Attend the University of Phoenix Online. Click Here!

Norwich University -- Get an MBA Online. Click Here!

DeVry Institutes -- Obtain a Bachelor's Degree Online or on Campus.. Click Here!

Keller -- Obtain a Master's Degree Online or on Campus. Click Here!

Free Tutorials

Microsoft Word Basics

Microsoft Excel Basics

Windows 98 Tutorial

Scalable SQL -- A Tutorial

RealSlideshow for RealPlayer

Beginner’s Guide to Paint Shop Pro

Intermediate Guide to Paint Shop Pro

Flash 5


Macromedia Flash 5

Click here to download Macromedia Flash 5 free. Then take our Macromedia Flash 5 tutorial. Our Macromedia Flash 5 tutorial covers creating graphics, working with layers, and adding motion, sound, and text to your Flash 5 movie.

 
Previous Page
Table of Contents

The Grid

In the exercises that follow, you will be creating graphics. When creating graphics, the grid is often helpful. To turn on the Grid:

  1. Choose View > Grid > Edit Grid from the menu. The Grid dialog box will display.
  2. Click on the Color box and select gray to have the gridlines display in gray.
  3. Select Show Grid to cause the grid to display.
  4. Select Snap to Grid to cause the edges of your graphic to align with the grid lines.
  5. Set the Horizontal field to 20 px to separate horizontal lines by 20 pixels.
  6. Set the Vertical field to 20 px to separate vertical lines by 20 pixels.
  7. Set the Snap Accuracy to Normal.
  8. Click on OK.

The Oval Tool

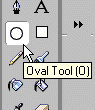
In the exercise that follows you will use the Oval tool to draw an ellipse. You will then turn the ellipse into a symbol. Symbols are reusable graphics you store in the Library. Later in the tutorial you will turn the ellipse into the button movie viewers press to start the movie.

To draw the ellipse:

  1. Choose View > Antialias from the menu. Choosing Antialias will smooth the edges of your drawing.
  2. Select the Oval tool. Two color boxes will appear on the Modifier panel. These color boxes are used to set the stroke and fill colors. The stroke color outlines your drawing. The fill color fills the center of your drawing.

You set the thickness of the Stroke line in the Stroke panel.

To set the thickness of the Stroke line:

  1. Choose Window > Panels > Stroke from the menu. The Stroke panel will open.
  1. Choose Solid from the drop down menu to select the type of line that will outline your drawing.
  2. Type 3 in the Vertical field to set the line thickness.
  3. Click on the Stroke color box and select black as your stoke color.
  4. Click on the Fill color box and select navy blue as your fill color.
  5. Click on the Stage and drag diagonally to draw an ellipse.

Previous Page Table of Contents


Legal   Copyright © 1999-2001 BayCon Group, Inc. All rights reserved